Tampilkan postingan dengan label Sandwiches. Tampilkan semua postingan

The “Hot Brown” – Kentucky’s Favorite Bourbon Absorbent

As I joked about in the intro, for something to be called a “Hot Brown,” and still become so wildly popular, is a true testament to just how amazingly delicious this really is. 

Invented at the Brown Hotel in Louisville, Kentucky, to help late night partygoers keep going, this hot turkey gratin may be my all-time favorite, fork and knife sandwich.

And for something that seems so decadent, I don’t actually find it to be all that heavy of a meal. Of course, that could be the bourbon talking. I guess you could use milk instead of cream to lighten this up, but unless you’re going to start eating these several times a week, I think you should stick to the original formula.

I’m sure this would be okay with some thickly sliced turkey from the deli, but roasting your own is pretty easy, and you can use the leftovers for a few less extravagant sandwiches. Either way, I really do hope you give this Kentucky classic a try soon. Enjoy!


Ingredients for the sauce (enough for 4 small or 2 giant portions):
2 tablespoons salted butter
2 tablespoons all-purpose flour
2 cups heavy cream
1/2 cup Pecorino Romano cheese, plus more for grating on top
pinch of freshly ground nutmeg
salt, freshly ground black pepper, and cayenne to taste

For the turkey (enough for 4 portions):
1 teaspoon oil or butter to grease baking dish
2 pound boneless turkey breast
1 tablespoon kosher salt
1 teaspoon herbs de Provence, or other dried/fresh herbs of your choice
- Roast at 350 F. to an internal temp of 148 F.

For each Hot Brown:
2 pieces white bread, toasted
6 ounces roast turkey breast (3 thick slices)
3 slices of tomato
enough prepared cheese sauce to cover
grated Pecorino Romano for the top
paprika or cayenne for the top
2 slices bacon, precooked
chopped Italian parsley

- Finish under a low broiler, or in 475 F. oven until the sauce is bubbly and browned, and the bacon is cooked. To cheat, you can cook bacon crisp separately, and just top the finished dish, but I think it tastes better if you brown with the bacon on top.

American Gyros – Mystery Meat Demystified

If you’re from Greece, you’re probably pretty confused right now, and wondering why I’m calling this gyros. There, pork and chicken are used, in non-ground form, and as the meat turns slowly over a fire, the cooked, caramelized surface is shaved off into thin slices. 

It’s amazing stuff, but believe it or not, I prefer this Americanized “mystery meat” approach, which uses ground lamb and/or beef. The spices are similar, but the texture is totally different, and for me, more interesting. I can eat fresh, identifiable meat anytime, so when I’m in the mood for gyros, I want the stuff you can only get from certain street vendors. Of course, since the meat is ground, you’re taking their word for which specific animals made the ultimate sacrifice, which is why this stuff became affectionately known as “mystery meat.”

This style is perfect for making ahead of time. Once it’s chilled, and sliced, all you need to do is brown it in a pan, and find some flatbread to roll it up in. Preferably, that would be homemade Lebanese mountain bread, which I will attempt to show you in the near future. In the meantime, your favorite pita will do, just as long as you don’t forget to make some tzatziki. I really hope you give this a try soon. Enjoy!


Ingredients for 8 portions:
1 pound ground lamb
1 pound ground beef
1/2 cup finely diced yellow onion
4 cloves garlic, crushed
1 tablespoon freshly minced rosemary
2 teaspoons dried oregano
2 to 3 teaspoons kosher salt, or to taste (you can cook a small piece to test)
1 teaspoon fresh ground black pepper
1 teaspoon cumin
1 teaspoon paprika
1/8 teaspoon cinnamon
1/8 teaspoon cayenne pepper
2 tablespoons bread crumb
- Cook at 350 F. for 45 minutes, or until an internal temp of 160 F.
-- Note: to make the pickled red onions, simply slice them about 1/8-inch thick, and cover with red wine vinegar for a few hours, or overnight. They will turn into the beautifully colored garnish seen herein.

The Cuban Sandwich – Hold the Mojo

I don’t do a lot of sandwich videos, which is a shame, since the blog posts are pretty easy to write. Anyway, as promised during the last bread video, here’s how I like to build a Cuban, or Cubano sandwich.

From the early, non-troll feedback, I hear we did a pretty good job, except apparently I was supposed to serve some mojo sauce as a condiment. We did a beef mojo, which would not be great in this, but I don’t think we’ve ever filmed the sauce. Consider it on the list.

Slices of citrus-roasted pork seem to be very common in the sandwich, but I prefer more of a pulled pork. I used our paper pork recipe, which was great, but carnitas, generously moistened with some of its ownfat, would also work quite well. 

I've always assumed that day-old bread was perfect for grilled sandwiches, but I've heard that real Cubans are made on fresh bread, and that people who use stale are crazy. What say you? Regardless of how fresh your bread is, I really hope you give this Cuban sandwich a try soon. Enjoy!


Ingredients:
There are no amounts given, since you are the Mark of your Cuban, and fully capable of deciding how much “stuff” to use. Good luck!

Layered Idly Sandwich


When ever we eat Idli we dip a piece of it in a chutney and then try another bite with a different one - it is always one chutney at a time. And if you dip the same piece in all the chutneys it becomes messy. So I thought why not build an idli layer by layer like a cake and fill each layer with a different chutney, like icing. I had been toying with this idea so much to the extent of checking with manufacturers if they could make a square idli mould for me. That seemed like a lengthy process for which I had no time. But I had to satisfy my craving to taste the idli and my favourite chutneys together - all in one bite. There was a shortcut which was tempting enough. I used the round steel plates from my Dhokla maker (I could have used a cake pan too) to steam my idli rounds and voila made my idli sandwich with different chutney layers. I had chutney powder (mologai podi), coconut and mint chutney which I used for each layer. It tasted just yummy as I had expected. Plus it looked so beautiful!


Here's the recipe:

Ingredients: 
Idli batter
Mint chutney 
Coconut Chutney
Chutney Powder (Mologai Podi)
Clarified butter 
Round cake dish or Dhokla Maker plates
Parchment Paper


Method: 
1. Grease the cake pan/plate and line it with parchment paper cut in a circle, the same size as the base.  Pour in the Idli batter to your desired thickness. I keep it 1/2 " thick.

2. Place the cake pan in a steamer and steam for exactly 10 minutes. Remove and keep aside to cool.

3. When cooled, pass a knife around the sides of the pan/plate then overturn the plate carefully after topping it with another plate to unmould the idli cake. 

4. Cut the idli round into 4 quarters. Take one quarter and spread coconut chutney on it, then top it with another and spread with mint chutney, then alternate again with coconut chutney.  I had made only 2 chutneys this time so I had to repeat the layer. But you could use another different chutney instead. Then for the topmost layer I sprinkled with MTR's chutney powder and a few droplets of melted ghee (clarified butter) and brushed it evenly to coat. You could use as many layers as you want with different chutneys of your choice.  Enjoy!


Notes:

1. You can get ready made refrigerated idli batter from indian stores. The other option is to make your own. I will be soon posting a recipe for making traditional recipes.

2. The chutney powder is available in indian stores as well, but MTR is a good brand.


Chicken Calzones


Chicken Calzones

Ingredients:
3 cups All Purpose Flour 
2 cups Mozzarella cheese(grated)
1tbs Yeast  
1/2tbs Sugar            
1 tsp Salt                    
1 tbs Olive oil              
1cup Water
1 tbs Olive oil
Pizza sauce
Mushrooms
Green/Red Peppers
Tomatoes
Olives
         
Method:
1. Add the yeast and sugar to 1 cup of luke warm water in a bowl and leave to rise for 5 mins.

2. In a food processor, add 3 cups of  flour and salt. Pulse to mix well.  Add the bubbly yeast water to the flour and pulse on and off till everything comes together and forms a dough. If you find it too dry then just sprinkle a little more water taking care not to make it soggy. Keep pulsing and pausing till the dough becomes springy and starts to spin.  Add 1 tbs of olive oil and pulse once more, then remove.

3. Make the dough into a ball  and place it in a greased bowl. Cover with a moist tea towel or cling wrap and leave it on the counter in a cozy corner to rise for 1- 2 hours.

4.  While the dough is rising prepare the chicken filling as given in the recipe here. After 2 hours the dough is double in size. It is now smooth, spongy and ready for making calzones, pizza, foccaccia or panza roti etc.

The Calzones:

1.Divide the dough into 4 equal parts and shape each like a round ball.  Cover and leave for 10-15 mins. Take each ball and roll it into a fairly thin circle. I prefer pressing it with my fingers lightly to make a small flat round. Drop 1 tbs of pizza sauce on it. Give it a quick swirl so that it stays in the inner circle leaving the circumference clean and dry.

2. Mix together the chicken filling and some grated mozarella cheese (as much as you want). Place a portion of the filling mixture on the flattened round of dough. Do not over or under load. The filling should be just enough for you to be able to seal the calzone neatly.

3. You can also add olives, green/red peppers, tomatoes and sliced mushrooms to the filling if you like. Drizzle some more pizza sauce, some blobs here and there if you want and sprinkle some more mozarella cheese.

4. With wet fingers moisten the edge of the calzone, then dust a little flour on it so that it becomes sticky enough to seal the edges.

5. Close the calzone in the shape of a crescent, press the edges with a fork and tightly seal them. Care should be taken not to let the filling bulge out and touch the edges, If the edges are not sealed well then there is a chance of the filling leaking out while the calzone is baking. Repeat the same process for each one of the calzones.

6. Take a baking sheet, line it with parchment paper and place the calzones on it. Glaze them with an egg wash (egg whites whisked with a little water) prick them with a fork and bake in the center of the oven preheated at 400 degrees fahrenheit for 15 - 20 mins or until done.

7. Remove from the oven, let them cool a bit before serving them.


8. Drizzle some warm pizza sauce and mozzarella cheese on top and enjoy!

Grilled Bacon Meatloaf Burgers – Building a Faster Meatloaf Sandwich

I love meatloaf, but not as much as I love meatloaf sandwiches. In fact, I’ll make a meatloaf just for the leftovers. I’ll fry the cold slice in a buttered pan until hot and crusty, and enjoy it on toast with ketchup. 

This is basically that, plus bacon, in burger form. What it lacks in loaf shape, it more than makes up for by being faster and easier. By the way, even though we’re grilling this in honor of Labor Day weekend, I actually think it’s better pan-fried. While I enjoy the smoky char the grill adds, I miss the crust you can only get on a really flat, really hot surface. I feel this way about burgers in general.

Also, if you cook this in a pan, you could deglaze, and spoon a little natural jus over the top. Either way, you’re looking at a delicious burger, and a nice change of pace from your usual cookout fare. I really hope you give these bacon meatloaf burgers a try soon. Enjoy!


Ingredients for 4 Bacon Meatloaf Burgers:
1 large egg, beaten
1 teaspoon kosher salt
1 teaspoon freshly ground black pepper
2 teaspoons Worcestershire sauce
1/2 teaspoon onion powder
1/4 teaspoon garlic powder                       
cayenne pepper to taste
pinch dried thyme
1 teaspoon brown sugar
1 tablespoon ketchup
1 pound ground chuck (85% lean)
1/4 cup plain bread crumbs
2/3 cup chopped cooked bacon

Egg Plant Bun Sandwich


Those who are not fond of egg plant would love this sandwich for sure. It can be packed for lunch to school or work place. So quick and easy to make and so healthy and nutritious!


Ingredients:
Egg Plant large - 1
Buns                 - 1
Dijon Mustard  - 1 tsp
Cream Cheese   - 2 tbsp
Green Olives     -  2-4
Pickled Dill       -  1 tsp chopped
Pickled Peppers  -  1- 2 rings chopped
Olive Oil             - 2 tbs
Salt and Pepper to sprinkle on the egg plant.


Method:
1. Wash, wipe dry and cut the egg plant into slices.
2. Sprinkle them with salt and pepper, brush with olive oil and bake in the oven till golden brown at 400 degrees fahrenheit for around 10 -15 mins.
3. Mix together cream cheese and dijon mustard then add the chopped olives, pickled peppers and dill. You may add some chopped parsely or cilantro if you want. Mix well and keep aside.
4. Toast the two halves of the bun and spread the prepared cream cheese dijon mixture on the insides of the bun halves.
5. Place the baked egg plant slices on top of the bottom bun half spread with cream cheese mix, then drizzle some ketchup and/or chilly sauce on them,  top with the other half of the bun which is also spread with cream cheese mix and enjoy your yummy healthy and nutritious bun sandwich.

Classic Split Top Hot Dog Buns – How We Should Be Rolling

When we posted our hamburger bun video last year, I received a bunch of requests for hot dog buns. My first thought was, just take the same dough and shape it into logs instead of rounds. I mean, come on…how hard is that? Turns out, that was just the grocery store talking. I’d been so used to eating those insipid side-split rolls, it took seeing a photo of a lobster roll to remember what a real hot dog buns are supposed to be like.

Don’t get me wrong; if you hand me a hot dog at the ballgame, it’s not like I’m going to throw it back in your face (unless you have Dodger face paint on), but given the choice, this butter-crisped, split-topped bun is the way to go. Thanks to its genius design, the meat and fixings go in the top, which leave three relatively flat sides to toast in butter. How this thing never got patented is the real mystery.

Just be sure to either buy hot dogs large enough to fit your homemade buns, or adjust the size of your rolls to match your favorite wiener. I’m sorry, but people who put short hot dogs on the long buns, and then pinch off the ends of the bread, should be put in jail. Not for life, but at least 3 to 5 years.

You can also make the same number of rolls as you have hot dogs, which apparently is the kind of calculation the hot dog bun industry can’t quite master. Okay, hot dogs come 10 in a package, so let’s do the buns in packs of 8. Seriously, what’s wrong with these people? Anyway, math aside, I hope you give these old-fashioned, split top hot dog buns a try soon. Enjoy!

Please Note: As I mention, this is the exact same dough as our hamburger bun recipe. Click here to watch the official dough video


Ingredients to make 8-10 hot dog buns:
1 package (2 1/2 tsp) dry active yeast (I used Fleischmann's “RapidRise” Yeast)
1 cup warm water (105 F.)
1 large egg
3 tablespoons butter
3 tablespoons sugar
1 1/4 teaspoons salt
1 pound all-purpose flour (*about 3 1/2 cups)
*Note: add a 1/2 cup of the flour to the yeast and water, and then the remainder before kneading

Bake at 375 degrees F. for about 20 minutes, or until golden-brown

Grilled Brie & Pear Sandwich and a Great Excuse to Make One

This grilled brie and pear sandwich is dedicated to National Grilled Cheese Sandwich Day, which happens every April 12, thanks mostly to bored food bloggers, and cheese industry marketing cartels…I’m looking at you, Wisconsin. 

No matter its origins, this cheesy, savory/sweet, flavor bomb is probably my favorite non-traditional grilled cheese sandwich.

If you’re going to do this, don’t get scared and omit the pepper and thyme. This is required to tip the sweet/savory scale toward the later. Just add a tiny bit your first time, and work up from there. By the way, this grilled cheese was inspired by a cold pear and brie sandwich I had at a café many years ago, and I’ve been doing it hot ever since.

Butter is kind of a key here. It looks like a lot, but you want a seriously crispy crust to fully enjoy the soft, warm cheese and sweet pear. So, if you’re celebrating National Grilled Cheese Sandwich Day, like any normal person who spends any time on Twitter is, then I hope you consider giving this buttery beauty a try. Enjoy! 

Chicago Italian Beef “Stew Meat Edition” – The Deep Dish Pizza of Sandwiches

I’ve always wondered how stewed beef would work instead of the traditional sliced roast beef for Chicago’s famous Italian Beef Sandwich, which is kind of weird, since I’ve only had the classic version a few times, and never actually made it myself. 

I figured if you’re going to roast a hunk of beef, then slice it and put it back in the juices, why not just cook the meat in a broth to begin with? How had the fine people of Chicago not thought of this obvious adaptation? Were the same people running the Cubs also in charge of civic recipe improvements? Was Kanye West somehow to blame? And another thing; why the hell would the Bears give Jay Cutler that new contract?

Anyway, once I finished my mad experiment, I realized that this wasn’t an improvement on an old sandwich at all; it was just a new sandwich. While the flavors are similar, the texture and overall mouthfeel of this sandwich is completely different. It’s much closer to pulled pork in that respect, but delicious nevertheless.

So, while this ended up not being the Chicago Italian beef breakthrough I had hoped for, it did make for a fine lunch, and if you’re looking for a manly hand-meal for your next shindig, I hope give this tasty, and very juicy sandwich a try. Enjoy!


Ingredients for 4 large sandwiches:
1 1/2 or 2 pounds beef chuck, cut in 2-inch chunks, seasoned with salt and pepper to taste
1 tbsp vegetable oil
6 cloves garlic, sliced
1/4 tsp red pepper flakes. to taste
1 tbsp dried oregano
1 tsp dried thyme
1 tsp dried rosemary
1 tsp freshly ground black pepper
1 1/2 tsp salt or to taste
1 bay leaf
2 tbsp white vinegar
3 cups chicken broth, or enough to cover meat by an inch
4 crusty sandwich rolls
1 cup drained Giardiniera (pickled vegetables), chopped into a relish
- Brown meat and simmer covered in the remaining of ingredients until tender

The Shooter’s Sandwich – Tally Ho Indeed

Even though this trendy shooter’s sandwich has been requested many times, I’ve resisted making one because I’ve always felt there were better handheld delivery systems for steak and mushroom ingestion. Like a panini for example, or maybe even a cheesy quesadilla; but pressed into a cold, hard wedge?

Then, I had an incredibly small epiphany. I ran across the origins of the shooter’s sandwich online, and realized I might have been missing the point. This wasn’t something you make for just any lunch; it was something you make to take on a foxhunt (or what you Americans call a “tailgate party”).

I can’t remember the last time I was on a foxhunt, but after giving this a try, I can see the advantages of this very filling, very flavorful, and very sturdy sandwich. But, as I stressed in the video, you really need a couple huge steaks to make this work. Even cooked slightly pass medium, this was okay, but another half-inch of tender, pink meat would have made the whole affair significantly better.

So, I guess if I were going on a long hike, or out for a relaxing day of shooting innocent foxes, I would consider making this again, but while I tucked in, I have to admit, I’d probably be dreaming about a steaming hot, steak and mushroom hoagie. Enjoy!


Ingredients for 8 Portions:
(Note: I didn’t measure anything, ‘cause it’s a sandwich, but these should be close enough.)

For the mustard sauce:
3 tbsp Dijon mustard
1 tbsp extra hot horseradish
1 tbsp mayo

For the mushrooms:
1 tbsp olive oil
1 tbsp butter, divided
1 1/2 pound button mushrooms
salt and pepper to taste
cayenne to taste
1/2 cup minced shallots
2 tbsp brandy or sherry

The rest:
2 at least 16 to18-oz well-trimmed beef steaks (rib eye, NY strip, or top-sirloin are best choices, in that order). Seared in some vegetable oil.
salt and pepper to taste
3-4 oz fine pate, optional
1 round loaf of crusty bread

Braided pastry logs


My sister-in-law is a great cook. During my visit to Montreal to see her, I got to taste her pastry puffs. She made them into squares with ground beef and red pepper filling. They were so delicious that I enjoyed every bite of them!  I loved the texture of the pastry dough so much that I got this recipe from her to share with you all.

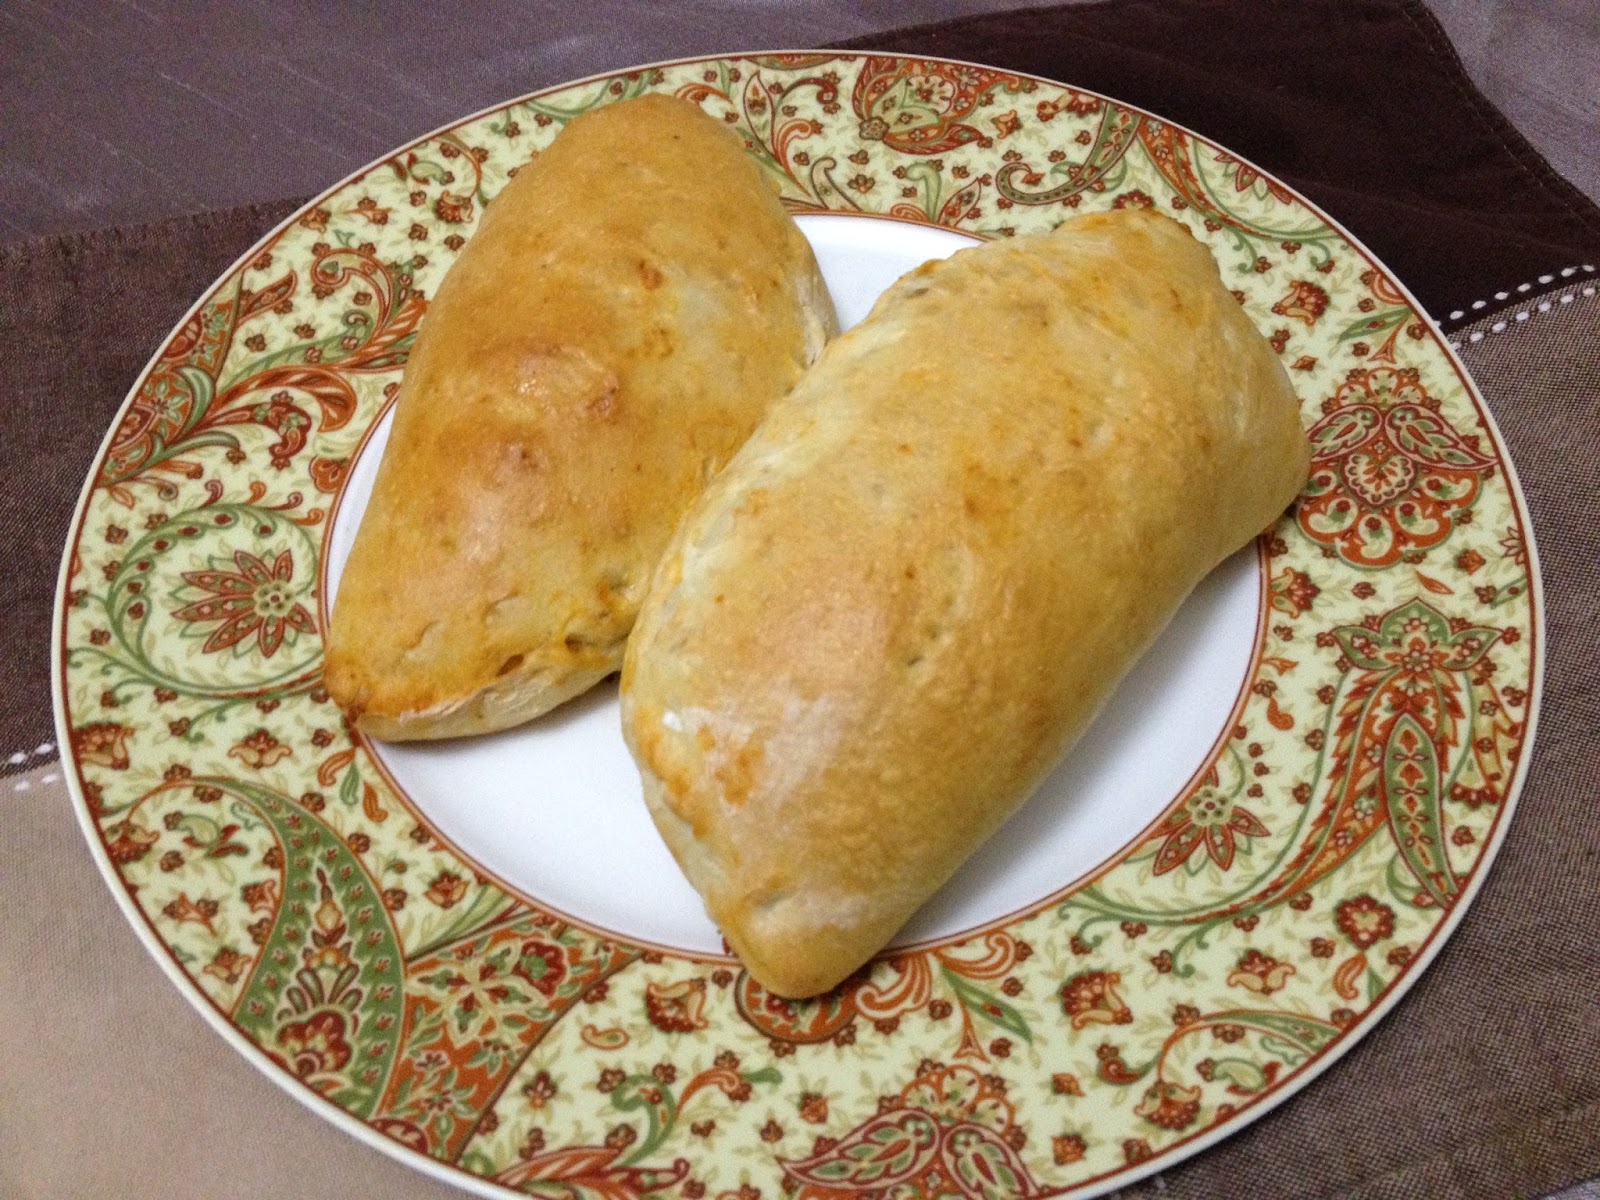
I gave a twist to this recipe by shaping the puffs in the form of a braided log. This not only gave a unique look but also kept the filling moist. And this time I used my own indian style filling which also enhanced the taste of the pastry well. You could in fact use any filling of your choice. And shape the pastry in your own way. Here's the recipe!

Ingredients: 

For the Pastry Dough:
White Flour - 3 cups
Eggs - 1
Butter (chilled) - 1/2 cup
Sour cream - 3/4 cup
Baking powder - 1
Salt - 1/2 tsp
Sugar - 1 tbs

For the Beef filling: 
Ground Beef - 1 lb
Onions - 2 (medium size)
Ginger garlic paste - 1 tsp
Red chilly powder - 1tsp
Coriander - 1 tsp
Turmeric powder - 1/2 tsp
Tomato paste - 1 tbs
Green chillies - 1 big or two small ones.
Cilantro - 1/4 cup
Cloves - 4
Green Cardamoms - 4
Vegetable oil - 2 tbs
White flour (just to sprinkle) - 1 tsp

Egg wash 
1 egg white beaten with one tbs milk

Pastry dough:

1. First to make the pastry dough, add baking powder, salt and sugar to the white flour and pulse the food processor one or two times.

2. Cut the chilled butter into small cubes and add to the processor, then pulse again.

3. Now add the beaten egg and sour cream. Combine everything well on low speed.

4. Remove dough and knead it with a little flour if it is too moist. Cover with a damp towel and set aside. 

Ground Beef Filling: 

1. Rinse the ground beef in a sieve. Keep a bowl under it and let it drain a bit.

2. Heat the oil in a sauce pan on medium heat. Fry half the finely sliced onions till soft and slightly golden.

3. Add ginger garlic paste, turmeric, red chilly powder and coriander powder. Mix well.

4. Roast the ground beef with salt in the masala till the water drains and it leaves an aroma. This will take 4-5 mins. Add tomato paste with half a cup water.  Sprinkle a little flour to make it bind. Mix well.

5. Cut the green chillies into small pieces on the cutting board with the remaining onions after sprinkling a little bit of salt. Crush the onions with the green chillies and salt and incorporate everything together with the knife. This makes  the onions sweat a little and also gives a flavour to the filling.
  
6. Add this onion mixture to the ground beef on top. Keep the cloves and cardamoms on one side of the pan. Top with chopped cilantro. Cover and simmer for 5 minutes till the water is absorbed and the filling is moist. Remove from stove.

7.Mix well and leave it to cool. Before using the filling don't forget to remove the cloves and cardamoms.

Method:

1. Roll the pastry dough into a big circle on the pastry board. Divide into 2 semi circles. Roll and shape each into a rectangle around 4"x9". 

2. Mix grated cheddar cheese with the ground beef filling and spread it horizontally on one side of the pastry sheet as seen in the picture.


3. Gently roll the pastry over half way while tucking the filling inside like a log. Make slits at the edge on the other side as in the picture.

4. Brush the edges of the strips with egg wash.

5. Now criss cross the strips on the log and stick them on the opposite side. The egg wash at the ends makes them stick well. Braid in the same fashion till the end of the log.

6. Brush with egg wash and finally to decorate sprinkle with black poppy seeds. Make sure the bottom of the logs is dry. So dust the pastry board with flour before working on the logs. 

7. Transfer the logs to a cookie sheet, greased and dusted with flour.


8. Bake the logs in an oven preheated at 350 degrees fahrenheit for 20 - 25 mins till golden brown. Cut the braided pastry logs int 3 inch pieces and enjoy!


Happy Croissant Sandwich


I call it the happy sandwich because everybody loves it. Fast to make, good to eat - a yummy lunch for school kids! 

Ingredients: 

Frozen Croissants
Chicken breast
Romaine or Leaf Lettuce
Tomatoes
Swiss cheese singles
Lemon pepper/Mango Chipotle powder or spices of your choice
Mayonnaise
Dijon Mustard sauce
Olive oil
Ketchup - optional

Method: Thaw the frozen croissants according to instructions and bake them till golden brown. Meanwhile cut the chicken breast into thin slices or strips. Rub with lemon pepper, or chipotle mango powder or any spices of your choice. (I used chipotle mango powder from Costco) Add some olive oil and roast or broil them in the oven till done. Remove from the oven and let it cool down to room temperature. Slice the tomatoes, wash, towel dry the lettuce and keep aside. When the croissants cool down a bit, slice them in the center with a bread knife more than half way through, without separating the two slices. Spread some mayo & dijon mustard lightly on the inside, add the chicken then top with swiss cheese, tomato slices and lettuce. Add some ketchup to the chicken if you want, just a few drops. Now close the sandwich and serve for lunch with some garden salad. You may also wrap it with cling wrap and pack it for lunch. The Happy Croissant Sandwich is ready to go!