Tampilkan postingan dengan label Mexican Food. Tampilkan semua postingan

Crispy Basket Burritos – For Once, Oven-Baked is Better Than Fried

I worked at a Mexican restaurant while in college, and one of my least favorite tasks was frying the flour tortilla bowls. You had to hold the two parts of the basket that formed them together while they fried, all the while getting splattered by hot fat, and breathing grease vapors. It wasn’t fun, but they did come out nice and crispy, so to everyone else involved, it was totally worth it.

Here, we’re using the oven to achieve what I consider a superior product. They’re just as beautiful, and crispy as the ones from the deep fryer, but seem to be much less greasy. Not to mention, the mess is significantly less. I’ll trade those things for a few extra minutes production time any day.

Just be careful not to burn them trying to get the inside bottom crispy. Since that area is protected from the sides, it’s not going to get as browned, but it doesn’t have to. As soon as this is filled, no one will know the difference. Speaking of filling, deciding that is probably the hardest part of this whole operation, but I’m confident you’ll come up with something worthy. I really hope you give these a try soon. Enjoy!


Ingredients for 2 Crispy Basket Burrito Shells (aka Tortilla Bowls, or Tostada Shells):
2 flour tortillas (about 8 inches in diameter)
1 tablespoon vegetable oil
oven safe ramekin, about 4 inches in diameter

Chicken Tinga – Torn Between Two Lovers

Whenever I’m ordering something with chicken at a taqueria, I’m always presented with the same three choices. The grilled chicken, the green chicken, which is cooked in a tomatillo sauce, and the red chicken, also know as chicken tinga.

I usually forgo the grilled option, since whatever I’m ordering almost always benefits from sauce; which leaves me with the nearly impossible decision of choosing between the red and the green. I love both, so I’m always torn. By the way, in Mexican culinary lingo, tinga means, “torn.”

Anyway, now that the title makes sense, I can finish this post up by reiterating how great this came out. There are faster methods to make this, but taking the extra time to reduce the cooking liquid, as well as possibly the sauce, really pays off in the end.

The real challenge here is deciding how to use it. You can’t go wrong with tacos, but my favorite delivery system is tostados. Fry up a corn or flour tortilla nice and crisp; top with tinga, and garnish with the usual suspects. It doesn’t get any better than that…unless the tortilla is shaped into a bowl, which I’ll show you how to do quickly, and mess-free, in the next video. Until then, I really hope you give this a try soon. Enjoy!


Ingredients for 6 large portions:
3 pounds boneless skinless chicken thighs
3 cloves peeled whole garlic cloves
1 large yellow onion, halved
1/2 teaspoon dried oregano
2 teaspoons kosher salt, plus more to taste
4 cups chicken broth
1 cup water
1 can (7-oz) chipotle peppers in adobo sauce
1 can (28-oz) peeled plum tomatoes (I recommend using San Marzano) or 3 1/2 cups of any fresh or canned tomato product
2 tablespoons olive oil or reserved chicken fat
1 large onion, diced
Cotija cheese and cilantro to garnish

Chorizo Fundido, Completo

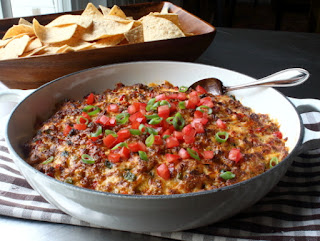
If too much sausage in a cheese dip was the biggest problem you have during a workweek, you have to consider that to be a pretty great week. They say, less is more, but I was hoping that twice the amount of chorizo in this fundido would make it twice as good, but that wasn’t really the case.

The taste was great, and as I said in the video, I highly doubt anyone at your party would complain, but what I really wanted was an ooey, gooey, much drippier dip, and so in this case, less would have been more.

Below, I’ve listed the amounts as I think they should be, with what I actually used in parentheses, and I’ll leave it up to you, to adjust as you see fit. Besides the sausage amount, I think adding some sour cream may also help the cause. Are you ready for some football? I am, but even if you’re not going to serve this chorizo fundido to a bunch of screaming lunatics on game day, I still hope you give it a try soon. Enjoy!


Ingredients for 8 portions Chorizo Fundido:
8 ounces fresh pork chorizo (I used 1 pound)
1/2 cup sliced green onions, the light parts
1 red bell pepper, diced
2 poblano chilies, diced
2 jalapenos, diced
4 ounces cream cheese (I used 8 oz)
4 ounces sharp cheddar
8 ounces Monterey Jack cheese
1/4 cup sour cream (I think it may help give a creamier texture)

Horchata – No Tigers Were Harmed in the Making of this Drink

When it comes to delicious, unique, and refreshing summer drinks, it’s hard to beat horchata. There are countless ways to make this, but my preferred method is easy, relatively quick, and doesn’t require any tigernuts, whatever those are.

Apparently, that’s what the original Spanish version contained, among other things, but we’re doing a Mexican-style horchata, which is done with rice and almonds. The result is something that sort of looks like milk, but is much lighter, and pairs perfectly with all your favorite summer foods. I know, summer’s almost over, but not here in San Francisco, where our hottest weather is just ahead.

Depending on your tastes, you can alter the amount of sugar, as well as the ratio between rice and almonds, but what you can’t alter is the need to strain this before serving. Unless you like gritty drinks, you’ll want to pass this through a very, very five sieve, multiple layers of cheesecloth, or both. I hear a plain white, cotton t-shirt also works nicely, but I’ve never tried.

As you saw, I tested a nut milk bag, which allowed a little too much sediment through for my tastes, but regardless, do not skip this step. It’s especially important if you’re not leaving the mixture to sit overnight, since the particles won’t have as long to soften. Other than that, there’s not much that can go wrong, and I really do hope you give it a try soon. Enjoy!


Makes about 2 quarts of Horchata:
1 cup long-grain white rice
1/4 cup raw almonds
1 cinnamon stick, or 1 1/2 teaspoon ground cinnamon
2/3 cup white sugar
7 cups cold fresh water (4 cups to blend rice, 3 cups added after)
ground cinnamon to garnish, optional

Note: Once blended, let sit overnight before straining, if possible. This way the water has plenty of time to leach out the goodness from the rice and almonds. The four-hour method does work, but you don't get quite the same flavor. Along the same lines, many horchata "experts" actually prefer to not blend immediately, but rather let the mixture sit overnight to soften, before blending the next day. If you like how this comes out, feel free to experiment, and test for yourself.

Refried Beans – Cooked Well, Not Twice

Contrary to popular belief, refried beans are not called refried beans because they’re refried.  As it turns out the name actually translates to well fried, as in so well fried, beans are reduced to a molten mash.  And what a delicious mash it is.

I don’t think I would ever sit down to eat just a bowl of refried beans, but they make everything they’re served with, on, or in, infinitely better.  Just as long as you use lard.  In my opinion, using rendered pork fat for these produces the ultimate refried beans.

Many folks insist on using bacon, and it’s always hard to argue against using bacon, but for me that smoky flavor, as delicious as it is, just overwhelms the rest of the ingredients.  Besides that enthusiastic recommendation, be sure to taste for seasoning at the end.

Since we don’t cook the beans with salt, it’s going to take some fairly generous seasoning later. In fact, any reviews less than five-stars will be the result of people under salting, and then unfairly blaming me. So, whether these are going on your Super Bowl nachos, or just in your regular recipe rotation, I really do hope you give this a try soon. Enjoy!


Ingredients for 8 portions refried beans:
For the beans:
1 pound dry pinto beans, soaked overnight
4 whole garlic cloves
1/2 teaspoon dry epazote, or teaspoon of dried oregano
9 cups cold water
- Simmer one and a half to two hours or until beans are very soft
For the refried beans:
1/2 cup lard
1 1/2 cups diced onions
2 teaspoons Kosher salt
2 tablespoons minced Serrano pepper
1 teaspoon ground chipotle
the cooked beans
reserved bean liquid, as needed (I usually use all of it)

Mexican-Style Shrimp Cocktail – The New Taco?

One of the many advantages of living in San Francisco is my proximity to some pretty amazing Mexican food. That used to be a much bigger deal, but happily, you can now get tacos and burritos in just about every corner of the country these days.

However, one item that hasn’t swept the nation like the others, is the Mexican-style shrimp cocktail. Which is a shame, since it’s every bit as good, if not better, than the more common version. Who knows? Maybe if this video goes viral, one day “Taco Tuesday,” will be joined by “Mexican Shrimp Cocktail Monday.”

Please just use the ingredients and amounts below as a rough guide, and adapt as you see fit. The spiciness, tanginess, and salt level are all very subjective things, and you’ll almost certainly need to adjust. I really hope you give this a try soon. Enjoy!


Ingredients for 4 servings:
1 cup clam juice
1 pound raw large shrimp, peeled and deveined
1/4 teaspoon dried oregano
1 cup diced English cucumber
1/2 cup diced celery
1/2 cup finely diced red onion
2 tablespoons jalapeno peppers, seeded, finely diced
1 1/4 cup diced, peeled, seeded ripe tomatoes, or quartered small cherry tomatoes
1/2 cup ketchup
2 freshly squeezed limes or to taste
freshly chopped cilantro to taste
Mexican hot sauce to taste
1 large Hass avocado, cubed

Classic Guacamole – How to Make Guacamole Like a Guacamaster

It’s National Guacamole Day, or at least for a few more hours it is. Having said that, there is no bad day to make guacamole. There are few things as easy, healthy, and delicious as this ubiquitous dip. However, unless you’re grinding your aromatic vegetation in a molcajete, or against a cutting board as seen here, you’re really not tasting a classic guacamole. 

The flavors not only become more intense, but actually change in character. This is just what those bland, fatty, but delectable avocados need. That and a thoughtful seasoning of lime juice, and maybe some more salt.

I know we’ve already posted a guacamole video, but that was like 8 years ago, and probably before I knew how to make it properly. I really hope you give this a try soon. Enjoy!


Ingredients for 12 portions:
1/4 to 1/3 cup finely diced white onion
2 tablespoons minced serrano pepper (or more jalapeño)
1/2 cup chopped cilantro, divided in half (half to grind, half to add later)
1/2 teaspoon kosher salt for grinding vegetables, plus more to taste
6 small or 4 large Hass avocados
1 cup diced ripe tomatoes, drained, optional
juice of one lime, or to taste

Chicken & Mushroom Chimichanga – A Thingamajig of Beauty

As legend has it, many years ago in Tucson, AZ, a woman accidentally dropped a burrito into a deep fryer. She started to blurt out a common Spanish swear word, but remembering her kids were in the kitchen, yelled out “chimichanga!” instead. She let it fry golden and crisp, and the rest is culinary history.

If you’re wondering, Chimichanga translates to “thingamajig,” which is fitting, since that’s kind of what this is. A thingamajig stuffed with whatever. In this case, whatever was a very tasty mixture of chicken, mushrooms, poblano chilies, and pepper Jack cheese.

While that particular combination is highly recommended, this is more of a technique video, so when it comes to the filling, I encourage wild experimentation. We used raw chicken here, but Chimichangas are also great for using up leftover, cooked meats. Just cube it up, toss it in when the vegetables are done, and proceed as shown.

And don't feel like you have to stay in the Tex-Mex zone. This versatile, folded and fried tortilla could make a fantastic delivery system for all kinds of ethnic foods. Anyway, no matter what kind of filling is used, or how it’s seasoned, I think everyone will agree that it’s never a good idea to curse in front of children. I hope you give this delicious son-of-a-gun a try soon. Enjoy!


Ingredients for 4 portions:
(exact measurements are not critical, as you can stuff these with anything that fits)

For the filling:
1 tbsp vegetable oil, divided (half for veggies, half to cook chicken)
1/2 cup diced onions
1/2 cup diced poblano peppers
1/2 cup sliced mushrooms
12 oz boneless skinless chicken breast meat, cut in 1/2-inch cubes
salt, freshly ground black pepper, cayenne pepper to taste
1/4 tsp cumin
1/4 tsp chipotle, smoked paprika, or other hot or mild ground chili pepper
pinch dried Mexican oregano
1 or 2 tbsp cold water to deglaze pan once chicken is browned
4 ounces grated pepper Jack cheese

Also:
4 large flour tortilla (at least 10-inch wide)
1 egg white
2 tbsp vegetable oil for pan-frying
sour cream, guacamole, and salsa to garnish, optional

Quick Pickled Jalapeno Rings – I Hear These are Great on Nachos!

Unlike nacho cheese sauce, the nutritional label on a jar of pickled jalapenos isn’t very scary at all, so you can’t use that as an excuse when your non-foodie friends start making fun of you for having too much time on your hands. Nope, you’ll just have to fess up to making these pickled jalapeno rings for the simple reason that you knew how.

While these are a no-brainer topping for your nachos, the fun doesn’t stop there. These make any sandwich more special, and any salad less snoozy. It would be faster to list things that this wouldn’t make more delicious.

As I mention in the video, these are intended to be used relatively soon after making, but they will last for a while in the fridge. You don’t have to be too worried about getting sick, as not much bad happens in a brine, but eventually they start to break down, especially if you slice them thin. Having said that, if you enjoy these as much as I do, they won’t be around very long anyway. Enjoy!


Please note: recipe below makes enough for two (8-oz) jars of peppers. I only pickled enough peppers for one jar, and saved the rest of the brine for something else.

Ingredients:
10 large jalapeno peppers, sliced
3 tbsp sugar (I like these kind of sweet, so use less or no sugar if you don’t)
3/4 cup white distilled vinegar
3/4 cup water
1 tbsp kosher salt
1/2 tsp oregano
1 clove garlic