Tampilkan postingan dengan label Appetizer. Tampilkan semua postingan

Chinese Scallion Pancakes

Happy Chinese New Year! It’s the Year of the Dog (and not the Manatee), and to celebrate I thought I’d show you my take on Chinese scallion pancakes. These fun-to-make flatbreads are a common fixture on menus around here, and while they all feature the same few ingredients, they come in a variety of thicknesses, which really affects the texture.

The thinner you make these, the crispier they’ll be, but you won’t get that nice, layered, oniony inside. On the other hand, if you make them too thick, they can be a little doughy inside, so I try to shoot for something in between. Speaking of inside, feel free to add pepper flakes or other appropriate embellishments before you roll these up.

Ideally, you leave the dough overnight before using, but I’ve always had great results with just a couple hours rest on the counter. If you do leave overnight, you’ll probably get a better flavor, and maybe texture, but the dough will be more elastic, and slightly more difficult to work with.

As far as the dipping sauce goes, I like to mix equal parts seasoned rice vinegar, and soy sauce, flavored with a shot of hot sauce, and maybe grating of fresh ginger. Toss in a few sliced green onions, and you’ll have yourself a very basic, but perfect condiment for these savory pancakes. Regardless of how you serve them, I really hope you give these a try soon. Enjoy, and gung hay fat choy!


Ingredients for 2 Chinese Scallion Pancakes:
one bunch green onions, mostly green parts, sliced thinly
For the dough:
2 cups bread or all-purpose flour
1 1/2 teaspoon kosher salt
3/4 cup hot water
- adjust with more flour or water to form a smooth, but sticky dough
For the oil mixture:
3 tablespoon veg oil
2 teaspoons sesame oil
1 tablespoon plus 1 teaspoon flour

- serve with dipping sauce, as described in the blog post

Flaming Greek Cheese (Saganaki) – Burning For You

I usually try to squeeze in one more sexy dessert video before Valentine’s Day, but instead I opted for this show-stopping, and super-savory saganaki. What it lacks in chocolate, it more than makes up in being on fire. I know what you’re probably thinking… what about a flaming chocolate dessert? Maybe next year.

In case you’re wondering, the original saganaki was not flambéed. This flaming cheese ritual was started by restaurateurs in Chicago, who were hoping a little bit of showmanship would help increase cheese appetizer sales, which it certainly did. They also made the experience interactive by encouraging customers to yell, “Opa!” as the plate was being ignited. If there’s one thing people love even more that flaming fried cheese, it’s yelling.

I really love kasseri cheese for this, since it holds its shape, crusts up nicely, and melts beautifully. I’ve also done this with a cheese called haloumi, which is tasty, but doesn’t melt at all, and for me that’s the best part. Beside those two, you can also use graviera, kefalograviera, kefalotyri, or even a firm feta cheese. No matter which cheese you use, I really do hope you give this a try soon. Enjoy!


Ingredients for 2 large portions:
4 ounce slab of kasseri cheese (about 3/8 inch thick), or other cheeses listed above
water and flour as needed
1 tablespoon olive oil
2 tablespoons brandy, room temp
1/2 lemon to squeeze over, or to taste
1 tablespoon freshly chopped Italian parsley
sliced fresh or grilled bread to serve alongside

Deviled Ham is Coming Back! Start Spreading the News

Deviled ham isn’t nearly as popular as it used to be, which even in its heyday, wasn’t very popular, and that’s a shame, since it’s such a delicious, and easy-to-make spread. By the way, its decline in popularity was a major factor in the collapse of America’s steamed ham industry. Just ask any Simpsons fan.

Besides providing a tasty treat, it’s always nice bringing something that no one else will. That means there’s no added stress wondering if your [insert popular dip or spread name here] is the best. I’m proud of my guacamole, but I don’t need it judged against three others. Besides, it's all politics.

I’d be happy to give you some additional tips here, but there aren’t any. Just be sure to taste and adjust for heat, and salt. The saltiness of different hams will vary greatly, so just because I didn’t need to add extra, doesn’t mean you won’t. And, like I said in the video, not only is this a great spread, but it also make a magnificent sandwich. Regardless of your delivery system, I hope you give this a try soon. Enjoy!


Ingredients for about 4 cups Deviled Ham:
1 1/2 pound smoked ham, cut into cubes
1/4 cup diced onion
1/4 cup chopped celery, with some leaves included
1/2 cup shredded hot pepper cheddar, or other cheese, optional
1/4 cup Dijon mustard
2 tablespoons hot sauce
1 teaspoon cayenne
1 tablespoon Worcestershire sauce
2/3 cup mayonnaise, plus more if needed
salt to taste
chives and pickled red peppers to garnish

New England Clam Chowder Dip – Because Great Soups Make Even Better Dips

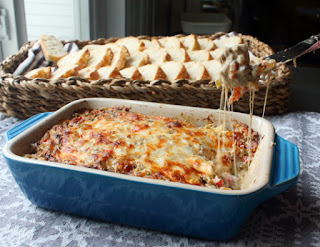
Truth be told, this New England Clam Chowder Dip is actually the first soup I’ve ever turned into a dip, but I still stand by my title. After all, what are soups, if not really thin, hot dips you eat with a spoon? 

The point is, while this may be my first soup-to-dip conversion, it’s probably not going to be my last. I’m looking at you, Mulligatawny.

I thought I was inventing something new here, but of course, like everything else, many people had already given this a go. The funny thing was, every recipe I looked at called for this to be served with sliced bread, which I thought was odd. To me, potatoes are like the second or third best ingredient in a chowder, so why not serve this with chips?

Besides that, my other big improvement was to up the bacon content. Some recipes called for as little as two slices. Two slices of bacon? What am I supposed to do with that? So, I went with three times as much, and it turned out to be a very good decision. While quite “bacon forward,” the clam flavor still came through, and all in all, this really was very chowder-like.

The only semi out-of-the-ordinary ingredient used was a spice blend called, “Old Bay.” This is not very hard to find in the big grocery stores, but just in case, here is a link to make a your own. Besides, even if you have some in the pantry, it may have been there for quite sometime, and while Old Bay works well, old, Old Bay may not, so it might not be a bad idea to make a batch anyway.  Either way, I really do hope you give this a great hot dip a try soon. Enjoy!


Ingredients for one small casserole dish:
6 slices of bacon, cut into 1/2-inch pieces
1/2 cup chopped green onions
1/3 cup diced celery
1/2 teaspoon salt, plus more if needed
1 pound cream cheese, room temp
4 ounces white cheddar
1 teaspoon Worcestershire sauce
1/2 teaspoon freshly ground black pepper
1/2 teaspoon Old Bay seasoning
2 cans (6 1/2 ounces) chopped clams, drained
2 tablespoons freshly chopped Italian parsley
pinch of cayenne for the top
potato chips to serve alongside

Philly Cheese Steak Dip – Fly Eagles, Fly

I was going to say this Eagles-inspired cheese steak dip would be great to serve at your Super Bowl party, but I just remembered we’re not allowed to use the term “Super Bowl” anymore, since that’s aggressively protected by the National Football League’s lawyers. So, instead of saying, Super Bowl, again, I’ll just say “Big Game.”

Regardless of what’s printed on your invitations, this easy to make hot dip would make a handsome addition to your snack table. Like all great party foods, it’s wonderful hot, warm, room temp, and, I’ve heard from a reliable source, even delicious cold. By the way, never print invitations to your Big Game party.

As I mentioned in the video, there are several approaches for preparing the steak in this. You can chop it up raw, and then brown it, or brown pieces of steak, and then chop it up, as we did here, or, if you really want to save some time, you could brown up some ground beef, which should also work pretty well in this.

For a vegetarian version, you could do this with well-browned mushrooms, which I’m guessing would be very tasty. I’ll never know for sure. Anyway, stay tuned for some kind of party food celebrating the other city in this contest, but in the meantime I really do hope you give this Philly cheese steak dip a try soon. Enjoy!


Ingredients for 24 portions of Philly Cheese Steak Dip:
1 pound top sirloin steak, cut into inch thick slices (any beef should work)
salt and freshly ground black pepper to taste
1 tablespoon olive oil
1 yellow onion, diced
1 tablespoon butter
1 1/2 to 2 cups diced peppers (use a mix of sweet, hot, and/or pickled peppers)
1 pound cream cheese, softened
8 ounces shredded provolone cheese
1/2 teaspoon Worcestershire sauce
touch of cayenne
- sliced baguette to serve alongside

Chennai Chicken Wings – A Football Snack from the Land of Cricket

I used to do a new chicken wing video every year before the Super Bowl, but that yearly ritual stopped when I sort of ran out of things to do with them. Being from Western New York State, where chicken wings are as much a religion, as they are a snack, I didn’t want these posts to become gratuitous and contrived.

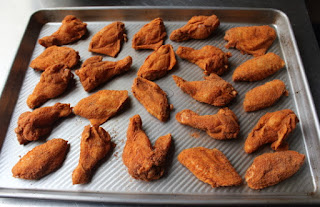
However, this year I was inspired to reestablish the tradition after enjoying an appetizer called “Chennai Chicken,” served at Dosa, which is one of my favorite Indian restaurants in San Francisco. Their version features thin strips of breast coasted with a ton of spice, and deep-fried to a gorgeous brick red.  

It’s one of those dishes you can’t stop eating, no matter how badly your mouth is burning, and I thought it would make a great approach for a batch of Buffalo wings. Since they’d never published the recipe, I did a lot of guessing here, but think I got pretty close. One of the key ingredients is an Indian spice blend called garam masala, which isn’t too hard to find, but if you can’t, here’s a link to a recipe for making your own.

As usual, feel free to alter the spice amounts as you see fit, but as I said in the video, do not skip the rice vinegar sauce. It really makes the dish. I’m not sure if these wings are too exotic for your Super Bowl party, or if your guests are not exotic enough for them, but I really hope you give them a try anyway. Enjoy!


Ingredients:
4 pounds split chicken wings
2 tablespoon cornstarch
2 tablespoon rice flour
4 teaspoons cayenne
4 teaspoons paprika
4 teaspoons cumin
4 teaspoons garam masala
1 teaspoon turmeric
2 teaspoons freshly ground black pepper
4 teaspoons kosher salt

For the ginger oil:
1 tablespoon grated ginger
2 tablespoons vegetable oil

For the sauce:
1/2 cup seasoned rice vinegar
2 tablespoons thinly sliced red onion
1 tablespoon julienned or grated ginger root
2 teaspoons sambal (spicy ground chili sauce)
1/2 teaspoon chili flakes

Butternut Bisque – To Roast or Not to Roast

That is the question, and for me the answer depends on what else is on the menu besides this delicious butternut bisque

When you roast butternut, you caramelize, and concentrate the flesh, and get something sweeter, starchier, and richer, which is perfect if you’re enjoying it as a meal, but maybe not such a great thing if it’s going to be followed by additional courses.

The last thing you want when you start a big holiday meal with a soup course are your guests feeling full when they finish. Of course, as with all things food, this is highly subjective, but I did want to share my thought process on skipping the roasting step.

I really enjoyed the festive, seasonally appropriate garnish seen herein, but if you are going for more of a stand-alone meal, it’s pretty amazing embellished with a handful of crispy bacon, and spoon of crème fraiche. So, whether you roast or not; whether you’re going to serve at some fancy feast, or just some chilly Tuesday night, I really hope you give this a try soon. Enjoy!


Ingredients for 6 portions:
1 butternut squash (about 2 lbs)
3 tablespoons butter
1 large onion, diced
1 teaspoon salt, plus more to taste
2 tablespoons tomato paste
1 quart chicken broth
pinch of cayenne
1/2 cup heavy cream or crème fraiche (plus more to swirl on top)
2 tablespoons maple syrup, or to taste
chives and pomegranate to garnish

Holiday Cheese Board – Finding Michele

After posting the long, and relatively complicated croissants video last week, I decided to take a little mental break, and do a video for how to put together a holiday cheese board. I’ve wanted to do this one for a while, and since we’re in the middle of entertaining season, I thought the timing was perfect.

It’s always stressful to have people coming over this time of the year. You want to please, and impress, but there never seems to be enough time to get everything done, especially in the kitchen, and that’s when a well-designed cheese board can save the day.

They’re fast to put together, and you don’t need any special skills, other than being able to talk to strangers at the fancy grocery store. Most feature extensive cheese selections, and it’s been my experience that the people who work in those departments love helping you pick out your cheese. 

I know this, since I’m married to one of those people. Michele used to sell cheese in various shops and charcuteries, and her selection/pairing skills are legendary. Customers would simply tell her how many guests were coming, as well as what was being served, in particular, which adult beverages, and she would work her magic.

I gave you our basic approach for composing one of these boards, but there are many different ways you can go, so I encourage you to find the “Michele” at whichever place you’re buying your cheese. You won’t regret it. No matter which cheeses you end up with, or how you garnish them, I really hope you give this a try soon. Enjoy!


Ingredients:

Le Mothais sur Feuille - Goat Cheese 
Prunes 
Fuyu Persimmons 
Bread - Rye Krisp 
Knife - Combo (spread, slice, stab) 

Manchego Membrillo - Sheep Cheese
Quince paste
Bread - water crackers 
Knife - slice and stab (knife with holes) 

Stilton - Cow Bleu Cheese 
Candied Pecans 
Grapes
Bread - sliced baguette 
Knife - spreading

Note: Allow for at least 2 ounces of cheese total per guest, as a portioning rule of thumb.

Flaxseed Crackers - Meet the “Flackers”

I usually try new recipes, or techniques because they sound delicious, or unusual, but once in a while I’ll try something just because it sounds impossible, and that was the case with these flaxseed crackers. 

I heard that if you mix flaxseeds with an equal amount of water, let it hydrate, spread it thin, and bake it in a low oven, you’ll get light, crispy, and surprisingly tasty crackers. I heard right.

I generally like to leave eating seeds to the birds, but these have a very mild nutty/earthy flavor, and while quite light, they’re still study enough to use with your favorite dips and spreads. Above and beyond the taste, I find that these start to lose their crispiness after about a day, so if you make them ahead of time, I’d re-crisp them in the oven again for maybe 30 minutes to dry them back out.

Also, please feel free to season these more creatively than I did. Although a plain cracker is perfect for pairing with a slice of cheese, I can’t help but think there are so many other ways these could’ve been spiced-up. Regardless of what you add to yours, I really hope you give them a try soon. Enjoy!


PLEASE NOTE: I've been told that whole flax seeds are not fully digestible, and to get the health benefits you should use flaxseed meal, but other sources are telling me that the soaking, and chewing takes care of that, maybe. Probably not a big deal unless you're going to eat a whole batch, but consider yourself warned if you are sensitive to high-fiber foods!
 
Ingredients for 32 Flaxseed Crackers:
1 cup raw flax seeds
3/4 teaspoon salt
1/4 teaspoon garlic powder
1/4 teaspoon onion powder
pinch of cayenne
1 cup cold water

- Soak overnight, then bake at 200 F. for 3 hours, or until crispy.

“Code Red” Cheese Spread and a Hot Pepper Challenge for ALS

I was halfway through production on this “code red” cheese spread, when I heard that Andrew from “Binging with Babish” had tagged me for his Hot Pepper Challenge for ALS. What are the odds? Anyway, I happily accepted his challenge, although, as you’ll see from this video, I took the coward’s way out, and used the almost already completed pepper spread, instead of eating whole chilies. I have some gastrointestinal issues that, while relatively minor, would make such an endeavor “problematic.” So, to make up for my good judgment, I donated a little extra, and hope you can do the same.

Above and beyond raising some funds for ALS research, this delicious spread is simple to make, and a real crowd-pleaser. Just ignore those initial complaints. As you’ll observe, people will literally be spreading more of this on their next cracker, while they tell you that it's too spicy. It isn't, and by the end of the party, they will agree. They may be sweating when they do, but they'll agree.

Here’s the link to Andrew’s video, where he shares the inspiration for the challenge, as well as heroically eats a habanero, AND a ghost pepper. It hurt just to watch. If you'd like to participate, the link is https://www.gofundme.com/alshotpepperchallenge. I really hope you give this great pepper spread, and hot pepper challenge a try soon. Enjoy!


Ingredients for about 4 1/2 cups “Code Red” Cheese Spread:
1 1/2 pounds cream cheese
8 ounces fromage blanc, mascarpone, or just more cream cheese
2 tablespoons tomato paste
2 teaspoons cider vinegar
1/2 teaspoon Worcestershire sauce
1/2 teaspoon onion powder
1/2 teaspoon garlic powder
1/4 cup sriracha hot sauce
2 tablespoons ghost pepper hot sauce, or to taste
2 tablespoons sweet paprika
2 tablespoons hot smoked paprika
2 teaspoons chipotle pepper
1 teaspoon cayenne, plus more to taste
salt to taste

Potstickers – For When You Can’t Decide Between Fried and Steamed Dumplings

Potstickers (or Pot Stickers, depending on which style guide you’re using) are very fast and easy to make, unless you only do them once or twice a year, in which case they’re going to take a little bit of time to fold and shape. 

Just for fun, find a video that shows professionals doing these, and marvel at how they come together in seconds. That's what happens when you do hundreds each day, for years.

Having said that, every second spent producing these, is a second well spent. The play between the crispy, crusty bottom, and the tender parts, makes for a truly unique dumpling. They’re also very versatile, since you can fill them with anything you want. No matter what you use, you’ll know exactly what you’re biting into, which is not always the case when you get these out.

Don’t get me wrong; I love the occasional take-out binge, and its associated mysteries. But, it’s nice being able to control the contents, as well as the generosity of the filling. There is nothing worse than biting into one of these, and realizing it’s only half-full. So, for all those reasons, and more, I really hope you give these a try soon. Enjoy!


One production note: While I’ve made these many times, I’ve never actually measured the ingredients before, so I ended up with extra filling. So, I’ve increased the dough amounts from what I used in the video. Instead of getting 24 wrappers, you should get more like 32 (cutting each quarter dough into 8, instead of 6 portions), which should be a better match. Of course this depends on exactly how much you fill, but it should be close.

Ingredients:
For the filling:
1 pound ground pork
4 cloves minced garlic
1/2 cup finely chopped green onions
3 tablespoons very finely minced ginger
2 tablespoons soy sauce plus 1 teaspoon soy sauce
1 teaspoon sesame oil
pinch cayenne
1 1/2 cups finely chopped green cabbage

For the dough:
2 1/2 cups all-purpose flour
3/4 teaspoon kosher salt
1 cup hot water (about 130-150 F.)

For the dipping sauce:
1/4 cup seasoned rice vinegar
1/4 cup soy sauce
Optional: You can spike dipping sauce with things like hot sauce, garlic, minced green onions, ginger, etc.

Rice Crispy Wings – No Breakfast Cereal was Harmed in the Making of this Video

As promised, here is the rice-flour coated chicken wings recipe I teased in the mumbo sauce video. It’s hard to believe that this is the first fried wings video we’ve ever done, but that was the case, which is why I’m so glad these turned out as well as they did. 

Besides being gluten-free, which is probably a big deal to a small, but enthusiastic part of my audience, this rice flour coating ended up being light, crispy, and extremely sauce friendly.

The original buffalo style chicken wings are fried without any type of coating, and while I do enjoy them that way, they aren’t the best at holding on to a sauce. This is why people started adding some kind of starch to the outside, which creates a less slick, rougher surface, that really grabs onto whatever you’re dipping, or tossing them in.

By the way, before your wings get coated with the flour, you’re free to spice these anyway you want. Other than the salt, everything else is up for grabs. I went very simple, as I usually do, but the mind reels at the possibilities. Regardless of how you flavor yours, I really do hope you give them a try soon. Enjoy!


Ingredients for *one pound of rice crispy chicken wings:
1 pound chicken wing sections (flats and drums)
1 teaspoon kosher salt (or 1/2 teaspoon fine salt)
1/2 teaspoon freshly ground black pepper
1/4 teaspoon cayenne pepper
1/2 cup rice flour, preferably "stone-ground" (you can grind you own in a spice mill)

* This can be scaled up to however large a batch you need. I usually allow 1/2 pound of wings per person for a party.

- If you’re doing a larger batch, be sure to give the wings a toss or two during the refrigeration time. By the way, two hours would be a minimum, but if you want, you can leave these overnight with the seasoning.