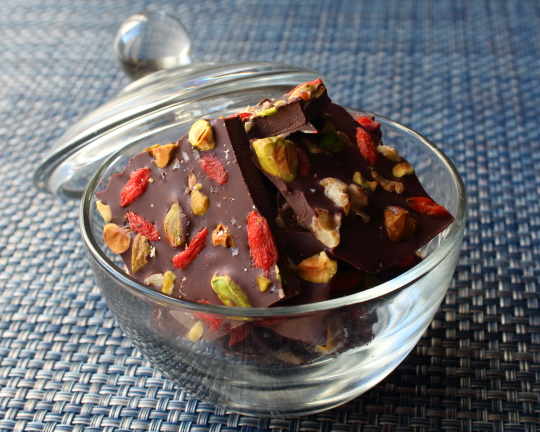
In addition to sharing an easy, and beautiful edible holiday gift idea, I wanted to make this chocolate bark so I could test a simplified technique for tempering chocolate without a thermometer. It sounded too good to be true, but worked fairly well, which is the problem. Is fairly good, okay?
Properly tempered chocolate will snap when broken, and retain that gorgeous glossy sheen. Poorly tempered chocolate is sort of dull grey, and the texture is soft, and waxy. This was somewhere in the middle.
Using this method, you will get close to properly tempered chocolate, and you might get lucky, and actually end up with perfectly tempered chocolate, but in hindsight, since using a thermometer isn’t really hard, and the extra steps required not that strenuous, I’ll probably just do it the right way next time.
In fact, I may do a future chocolate truffle video as an excuse to show you the “professional” method, but in the meantime, check out this great article I found on Allrecipes, as well as this video from Monarch Media that does a good job of explaining the steps. There are also hundreds of other videos online that take you through the procedure. Regardless of which method you go with, quick and imprecise, or deliberate and exact, I stand by my assertion that this would make a great holiday gift. I hope you give it a try soon. Enjoy!
I’m calling this “miracle fudge” for several reasons. First of all, the odds of me seeing a vegan fudge link on Twitter, and actually clicking on it, are roughly zero. That alone makes this video miraculous, but that cocoa, maple syrup, and coconut oil can combine to create something so pleasurable and fudge-like, also makes it worthy of the title.
Michele actually discovered the link on Twitter, and called my attention to it since she recognized the Tweeter as my friend, Stephanie Stiavetti aka @sstiavetti. Nothing against Ms. Stiavetti, but this still usually wouldn’t have been enough to tempt me, except that I heard mention of coconut oil.
This was significant because another friend, Ariyele Ressler, posted something called a "The Triple Luxe" on her YouTube channel(pictured here), which featured this fascinating fat. I was captivated by her delicious looking creation, and the coconut oil's butter-like properties, and told myself that I needed pick some up for experimentation.
Anyway, as a result of this perfect storm of social media synchronicity, I decided to check out her recipe, and it rocked. I did a bunch of tests, and even though you’re forfeiting some health benefits, I found the refined coconut oil worked better than the raw, extra-virgin style, if you want something closer to real chocolate fudge. The other key is to keep these in the freezer. They work at room temp, but the texture is much better cold.
The extra-virgin oil has a very pronounced coconut flavor, and seemed to not provide quite as firm a bite. Of course, I expect you to experiment and report back. As advertised, I think this would make a fun, and unique edible gift for the foodies on your holiday gift list. I hope you give this fudge recipe a try soon. Enjoy!
Bonus Holiday Gift Idea:
Not only does Stephanie have great taste in vegan fudge recipes, she also writes cookbooks! I just received a copy of Melt: The Art of Macaroni and Cheese, which she co-authored with Garrett McCord, and it’s very well done. It’s getting rave reviews on Amazon, so if you’re still in shopping mode, go check it out.
Ingredients for about 2 dozen squares of Miracle Fudge:
Every once in a great while, I get a food wish from someone I admire and respect so much that I just can’t say no. This “Pad Thai” popcorn recipe was their latest request, and as always, I was more than thrilled to make this very influential person’s snack dream come true. Who is this mystery foodie? Me!
I was channel surfing late one night, and caught the very tail end of a show featuring a hot spot in Charleston, SC, called The Gin Joint. The theme was unique bar eats, and the host was talking about something called, “Pad Thai” popcorn. What was that?
I heard those words, and saw maybe five seconds of footage of what looked like caramel corn in a basket, and that was it. Frustrated, but quite excited, I jumped online to find the bar’s website, and hopefully the recipe. Nothing.
There were a few links with people talking about it, and a couple cell pictures, but no actual official recipe to be found. So, I decided to give myself a food wish – figure out how to recreate this extraordinary-sounding snack. I decided to simply fortify a standard caramel corn recipe with peanuts, lime, hot chilies, fish sauce, and cilantro.
Maybe it was beginner’s luck, or the collective consciousness of all the poor souls who’ve tasted that popcorn and desperately wished they could make it at home, but it came out incredibly well. Crispy, crunchy, sweet, spicy, aromatic, and awesome! You know I’m a fan of the hyperbole, but it’s with all sincerity that I say, this may be the greatest caramel popcorn-related snack breakthrough since balls.
By the way, since this was my first attempt, please feel free to adjust the ingredients amounts and report back. I think next time I’ll add a bit more lime and fish sauce, for a little extra kick. I may also explore using tamarind juice and/or palm sugar. Anyway, I hope you give this unbelievably addictive “Pad Thai” popcorn a try soon. Enjoy!
Ingredients for about 8 cups of Pad Thai Popcorn:
1/3 to 1/2 cup popping corn kernels (roughly 8 cups prepared popcorn)
1 cup finely chopped dry-roasted, salted peanuts
1/4 cup chopped cilantro
For the caramel sauce:
1/2 cup packed brown sugar
1/4 cup vegetable oil
1/4 cup corn syrup
2 or 3 tsp fresh lime juice
1 tbsp freshly grated lime zest
1 1/2 tbsp Asian fish sauce (fyi, if you don't use fish sauce, you'll have to add salt)
1 rounded tablespoon Sambal red chili sauce, or very finely diced fresh hot chilies
rounded 1/4 teaspoon baking soda (not baking powder) *bake 45 minutes at 250 degrees F., tossing 3 or 4 times during the cooking. View the complete recipe
I loved everything about these brownies, except the flavor. I love mint, I love chocolate, and I love chocolate mints, but for whatever reason, I don’t like chocolate mint brownies. It’s quite a personal mystery.
My wife Michele’s theory is that since we love the pure chocolately goodness of classic plain brownies, the addition of that extra layer of flavor, especially one as distinctive as mint, just throws everything off. That could be.
Also, I don’t like the combination of nuts and mint, and so these didn’t contain walnuts or pecans like they usually would. Maybe it’s nut denial that has me in this anti-mint mood. Anyway, enough about my problems, if you like chocolate mint brownies, which based upon all the requests I got, many of you do; you’ll probably love these.
I’ve used a very stripped-down method here that requires almost zero technique, and uses only cocoa powder to achieve a dense, chewy, very chocolatey brownie. I hope you give these a try, and if you don’t enjoy mint either, just leave them un-iced, or add another flavoring like vanilla, orange, or rum extract. Enjoy!
I want to thank a Twitter follower of mine, RookieKoo, for giving me the idea for today’s Michael Buffer-inspired post title. Of course, if you’re not familiar with the iconic boxing ring announcer’s catchphrase, then none of this will make any sense, and you’ll just have to trust me when I tell you it was an amusing reference.
There are hundreds of ways to make rum balls, but this one’s my favorite method. It’s very easy, especially if you have stale brownies lying around. I know, that never happens, which is why I’m linking to an all-purpose brownie recipe below the post. This will also work nicely with store-bought brownies, but stay away from anything that’s frosted. We don’t want to add any additional fat into the recipe, since that will hinder the absorption of the rum.
The amount of rum you add depends on how cakey and/or dry your brownies are, but for a half-pound, you’ll probably need between 1/4 and 1/3 of a cup to soak the crumbs sufficiently. A proper rum ball should be a fire hazard. By the way, I’m not responding to any comments asking about how to make these without using rum. In my humble opinion, you can’t.
The other issue I'm not going to be a big help with is altering the type of chocolate. I used a quality dark chocolate (70% cocoa), which worked beautifully for this, and hope you do the same. I don't have a lot of experience working with chocolate, so I'm not sure what will happen if you want to use white, milk, or other kinds of chocolate for the coating.
I realize these are more of a candy, than a cookie, but after about a half-dozen rum balls, culinary semantics will be the furthest thing from your mind. I hope you give them a try on your holiday dessert table. Enjoy!
Ingredients for about 20 small rum balls:
8 ounces stale chocolate brownies, crumbled
1/4 to 1/3 cup dark rum, or as needed
4 oz dark chocolate (I used Lindt Dark Chocolate 70% Cocoa)
NOTE: For a quick and easy brownie that will work well for these rum balls, check out this recipe from Allrecipes.com. I recommend checking out the comments on that recipe page before starting.
I was reading some comments under this peach gelee video on YouTube, and was shocked by the number of “omg! the sugar!!” type remarks. People, this is a candy, not a dessert. Candy is supposed to be an extraordinarily indulgent bite, enjoyed in small amounts only on certain very rare and special occasions.
Unfortunately, candy has lost its specialness, and somehow turned into a casual snack. We've gone from enjoying it at a couple sacred yearly festivals, to eating several handfuls a day. Let’s face it, the only reason you go up and chat with that receptionist is because she works behind a giant fishbowl filled with mini Snickers bars. Everybody knows.
Well, this fresh peach gelee is not that kind of candy. This is an old fashioned, handcrafted candy that takes a little time and finesse to pull off. It’s simple and sweet, but looks and tastes like something you’re only suppose to enjoy a few times a year.
I’ve never made this before, but saw an easy-looking recipe here, and tweaked it by using lime instead of the more traditional lemon. The recipe worked like a charm, and has me thinking about a late fall version using spiced pears. The method really intensifies the fruit flavors, and I find the jellied texture it produces very addictive.
Anyway, I hope you find some nice ripe peaches, and give this a try soon. If you’ve had experience making these types of gelees with other fruits, I’d love to hear your thoughts. Thanks, and enjoy!
Step 1:
1 pound ripe peaches, cut into chunks
1 tablespoon lime juice
- Puree and add to sauce pan with 1/2 cup of sugar