Cranberry sun-dried tomato chutney

Ingredients: 
Fresh Cranberries - 1 pack
Sun-dried tomatoes - 1 cup
Thai red chillies (pricked) - 10
Green chillies (pricked) - 5 (optional)
Dried red chillies - 4 (optional)
Vegetable oil - 1 cup
Cumin seeds- 1 tblspn
Fenugreek seeds - 1/2 tblspn
Red chilly powder - 1 tblspn
Brown sugar - 1/2 cup
Juice of one big lemon
Garlic cloves peeled - 6-8
Crushed garlic cloves unpeeled - 2
Vinegar-1 cup
Mustard seeds - 1tspn
Kosher Salt - 1/2 - 1 tblspn or as required.

Method:

1. Wash and drain the cranberries and keep aside.
2. In a bowl mix together sun-dried tomatoes, peeled garlic cloves, thai red chillies and half the vinegar.
3. Dry roast separately the cumin and fenugreek seeds. When they cool down grind them and set aside.
4. Heat 1 cup of oil in a sauce pan. Add mustard seeds and when they crackle add the dried red chillies followed by the 2 crushed unpeeled garlic cloves and pricked green chillies (if left unpricked they burst when put in the hot oil). Then immediately add the cranberries, ground cumin-fenugreek powder and red chilly powder. The whole process has to be done very quickly and carefully without letting any of the ingredients burn.
5. Add to this, the sun-dried tomato mixture from the bowl  followed by the remaining 1/2 a cup vinegar, salt, brown sugar and lemon juice. Give it a good stir and remove from pan.
6. Let it cool down, then fill it in a glass/ceramic jar.

The cranberry sun-dried tomato chutney is now ready to enjoy.


My Koobideh

My Koobideh call for no fat, absolutely no fat at all. Yet when I made them nobody could tell the difference! They were just as juicy as any other koubideh and everybody just enjoyed them asking for seconds and thirds.

I always wanted to make koobideh but without fat and each time I tried they turned out so dry and tasteless that it felt like eating a piece of cardboard. I got fed up and stopped trying altogether.

 It so happened that after making kibbeh there was so much extra lean finely ground beef left over and I had to use it all up (I never refreeze any food after partially or completely defrosting it). While I was just speculating on how I could make juicy kebabs with it, what I should add - eggs and cornstarch or  mushrooms, etc, etc, my eyes fell on the almond butter bottle in the shelf and lo and behold my juicy koobideh were born!

What can be a better substitute to fat other than almond butter? It not only gives a better taste but is a much better healthy choice as well. "Almond butter is not only a good source of protein but is packed with monounsaturated fats, which are good for the heart, and also helps to control blood sugar".

Some people might argue that the fat burns off when you grill them so why take the unnecessary expensive alternative of using almond butter. The fact is that the fat does not entirely burn off. When the kebabs cool down you can still see a film of fat sticking to them. And this fat can clog your arteries and give you a heart attack.

Here's the recipe!

Ingredients:
1 kg Finely ground extra lean beef (no skin and 0% fat)
1 tbs Garlic paste                            
1 tsp Black pepper ground              
2 tbs Fried onions (either store bought or home made)
2 tsp Seven spices                          
1 tsp All spice                                
1 tsp Cumin powder                      
1 tsp Salt as per taste)
1/2 cup Fresh Parsley (chopped)
1/2 cup Almond butter                         -
1 tbs Vegetable oil (optional)
1-2 tbs Water                                      
4-6 Flat metal skewers                

Method:

1. Grind together fried onions, garlic paste and fresh parsley along with all the spices and 1 tblspn of water.  Add this paste to the ground beef.


2. Add the 1/2 a cup of almond butter with the almond oil to the beef. Keep kneading it like dough till it stops sticking and starts leaving the sides of the container.  If it is too sticky and dry add just 1/2 - 1tbs of water. The more you knead the lighter the kebab texture. The kebab dough should be moist and airy and should not stick to your hands. Knead well and leave to marinate in the fridge for an hour or two.

3. Do not add any extra vegetable oil if the almond butter is runny and if you can see the almond oil covering the top of the almond butter.

4. Brush the skewers with oil as this makes it easier to slide off the kebab when it is done. With clean wet hands take a golf size ball of the prepared ground beef and wrap it around the skewer till it holds together. Shape it into a nice, long, smooth and round sausage then with your index and middle finger mimicking scissors pinch both ends of the kebab alongside to form ridges.


5. Repeat the steps for all of them. Leave enough room on either side of the skewers so as to rest them on the grill.

6. Set your oven to broil on high (or 550 degrees fahrenheit).

7. Take an old cookie sheet and cover it with tin foil. Place the skewers on the cookie sheet. Then place it under the grill in the top position of the oven.

8. Broil for 3-4 mins on each side. Do not over cook as they would harden. When you see them turning golden brown turn over and cook for another 3- 4 mins till they are done. Keep some tin foil ready. Remove them from the oven. Slide them off with the help of salad tongs into the tin foil and wrap them up immediately.  This helps in retaining the moisture and heat till you serve them. You have to be very careful and use oven gloves while handling the skewers as they are very hot.

9. Serve them hot with persian or afghani rice and yoghurt mint chutney which you can make by adding 1 - 2 tsp dried mint leaves, 1/2 and inch chopped ginger, salt and pepper to 1/2 a cup yoghurt.

10. You may also grill some vegetables (tomatoes, green, red peppers, onions etc) in a skewer to eat with the kebabs.   Serve them hot on a bed of sliced onions and mint chutney with persian or afghani rice. Enjoy the koobideh and eat your way to health.

Crispy Onion Samosa Chaat


The Fresh Gourmet crispy onions from Costco are amazing. Their crunch and flavor gave a new dimension to the samosa chaat I made today. Unlike other fried onions we buy from Indian stores these are neither oily nor salty. I would say you could not only use them in some of your dishes but also eat them as a snack. I served my chaat with pomegranate seeds strewn on top, also some hickory sticks which made it even more tantalizing! And above all it takes only 2 mins to make this chaat.

Here's the recipe!

Ingredients:
2 Samosas
1 cup Yoghurt
1/4 cup Onion chopped
1small Green chilli chopped
1/2 tsp Ginger chopped
1/2 tsp Chaat masala powder
1/4 cup Fresh Gourmet crispy onions
1 tbs Green Chutney
1 tbs Tamarina Chutney
Just a few Hickory sticks (optional)
Salt to taste
Fresh Cilantro chopped
A few Fresh pomegranate seeds

Method:


With these ready made ingredients make your chaat in no time. So quick and easy to make, so yummy to eat!


1. Whisk 3/4 cup of yoghurt in a bowl. Add chopped onions, green chillies, ginger and a little     cilantro, salt and chaat masala powder. Mix everything well. 


2. Break the samosas into bite size pieces and spread them in a layer over the yoghurt mixture.


3. Drop 1tbs each of the tamarina and green chutneys over the samosas as shown in the picture.


4. Spread the remaining yoghurt over the chutneys and sprinkle some chaat masala powder.


5. Layer the top generously with the Fresh Gourmet crispy onions. Add some Hickory sticks if you want more crunch and flavour.


6. Decorate with fresh pomegranate seeds and chopped cilantro. Enjoy your tongue tingling and mouth watering Chaat!


Cheesy scalloped potatoes

I usually made scalloped potatoes in the traditional style which I found quite bland. So I gave a twist to the recipe by using caramelized onions and cheese in between the potato layers as well as at the top. It turned golden brown in the oven and the dish looked not only appealing but also very tasty. The caramelized onion enhanced the flavour and it was so yummy.


Ingredients:
Potatoes - 6 medium size
Onions - 2 big ones
Brown sugar - 2 tspns
Milk - 1 cup
Butter - 2 tblspns
Olive oil - 2 tblspns
Dried chives - 1 tspn
Dried parsley - 1 tspn
Cheddar cheese - 1/4 cup
Mozzarella cheese 1/4 cup
Black pepper ground- 1 tspn


Method:
1. Boil the potatoes, peel, cut into slices and set aside.
2. Melt 1 tblspn of butter with 1 tblspn of olive oil in a pan.
3. Caramelize the onion slices by adding a little brown sugar. Remove from pan and set aside.
4. In the same pan add the remaining one tablespoon each butter and olive oil.
5. Stir in flour followed by milk and make a smooth white sauce.
6. Preheat oven to 350 degrees Fahrenheit.
7. Take a baking dish, grease the bottom and sides with butter. Put the caramelized onions at the bottom.
8. Spread the boiled potato slices in a layer over the onions.
9.Sprinkle some dried chives, dried parsley, salt and black pepper followed by grated cheddar cheese.
10. Spread one more layer of the boiled potato slices followed by the same herbs and spices.
11. Now pour in the hot white sauce over the potatoes and top with grated mozzarella cheese.
12. Bake in the preheated oven for 15 to 20 mins until it turns golden brown on top. Serve hot with beef ribs or chicken roast and salad. Enjoy!


Spicy Indian Sushi

Who says Sushi can be made with only uncooked sea-food or raw vegetables? My little parcels of joy can change the way we eat indian food. I feel I am down with Sushi mania now and I suppose my daughter Asma who is Sushi crazy has already infected me!! I enjoy eating all kinds of Sushi except the ones with the soft shell crab coz the whole crab is stuffed with its shell which I find unappetizing to my palate.                                                                                 
I always craved for some spicy Sushi and being a fond lover of Indian food I longed to indianize the Sushi. Asma's crazy culinary adventures dragged her away from Indian food altogether and she was beginning to develop a hatred for indian cuisine which really hurt me. Last week I packed the indian sushi stuffed with the fried chilly shrimp for her lunch expecting her to throw it away (usually she never touched the shrimp if I made them in indian style). But I was shocked with disbelief when she told me that it was delicious and that she not only ate it but enjoyed it too. 

Here's the Sushi and its Recipe!


Ingredients: 
2 cups Sushi Rice boiled / steamed
1 Pack Sea weed 
20 Jumbo Black Tiger Shrimp or any other variety but uncooked 
1 tsp Kashmiri Red chilly powder
1/2 tsp Turmeric
1 tsp Ginger garlic paste
1 cup Shredded coconut
1/2 cup Cashew nuts 
2 tsp MTR chutney masala
2 tbs Vegetable oil 
Salt as per taste

Wasabi, pickled ginger, soy sauce with ginger and green chillies or frank's red hot sauce etc as condiments.

Sushi mat, Cutting board, Cling wrap for preparation. 

Method:


1.Peel, wash, devein and clean the shrimp.

2. Add salt, turmeric, red chilly powder and ginger garlic paste to the shrimp, mix well.

3. Fry them in a tbs of vegetable oil in a skillet or wok on both the sides and set aside.


4. Roast the shredded unsweetened coconut in a non stick pan. Add ground roasted cashews. mix well and let it cool down.


5. Spread the Sushi mat on a cutting board. Put a sheet of plastic wrap of the same size on the sushi mat. (You may also cover the sushi mat with plastic wrap on both the sides if you want).

6. Take a scoop of the boiled sticky sushi rice and with wet hands spread it on the saran wrap. Press it with your hands into a thin smooth layer.

7. Now put the sea weed on the rice layer.  This is for inside out sushi. For the regular sushi the rice is spread on the sea weed.


8. Cut the masala shrimp into small pieces. Add them in a horizontal line on one side on the sea weed  a little away from the edge from your side as shown in the picture.

9. Roll the free edge to envelop the shrimp filling with both the hands tightly. The mat helps you roll easily. As you are rolling with the help of the mat, take care to keep peeling off the plastic wrap from the rice. You don't need to do this if you have wrapped the mat with the plastic wrap on both the sides. Complete till the end as shown in the picture.


10. Now roll it in the roasted shredded coconut and cashew mixture till it sticks evenly throughout.

11. Cut into sushi rolls with a clean wet knife and serve with pickled ginger, wasabi sauce and soy sauce. Enjoy!


Tips:

You can use different fillings for different flavours. I used eggplant filling, avocado mango filling for vegetarian sushis.

For traditional plain rice sushi, mix the rice with a tbs of rice vinegar and sugar. For extra flavour a little piece of the sea weed is soaked in the white vinegar for sometime and then removed before adding the vinegar to the rice. In Japanese "Su" means vinegar and "Shi" means rice. So Sushi is not complete without any vinegar in it.


Smoked White Chicken

I have been looking for a good brand of garam masala powder for so long and only last week this new Zafrani Shaan garam masala attracted my attention and when I checked the ingredients, I knew this is it!

I am not a fan of Shaan spices at all and I hate them all except for one or two as they are all the same. But this one has just the garam masala spices and not cumin or coriander or anything else like other brands, plus it has saffron too.

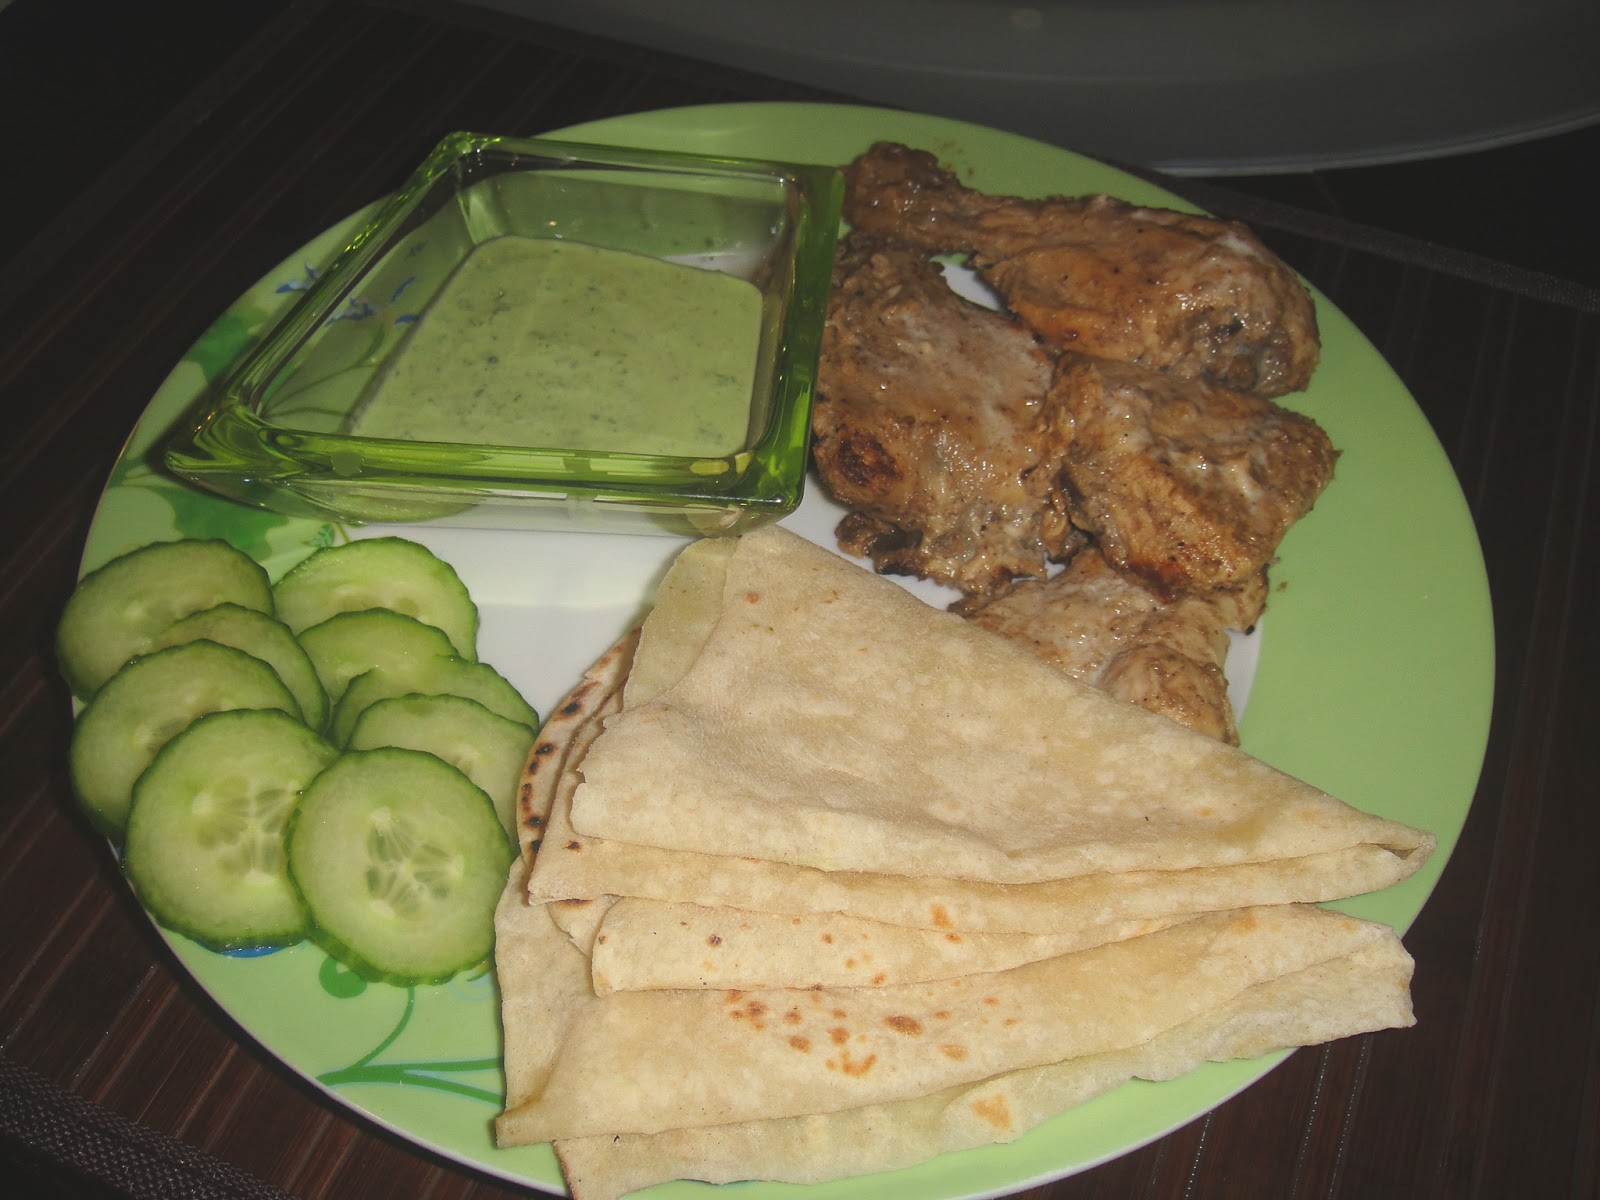
I used it today in the marinade for smoked white chicken. The garam masala enhanced the taste and the smoky flavour in the chicken was awsome. Everybody just loved it. In fact they were all duped into believing that I barbequed the chicken when I didn't.Here's the recipe.

Ingredients:
Chicken - one whole
Garlic paste - 1 tblspn
Dhania (coriander) powder - 1 tspn
White Chilly powder - 1 tspn
Shaan's Zafrani garam masala - 2 tspns
Yoghurt - 1/2 cup
Salt - 1/2 tspn
Lemon juice or red wine vinegar- 1 tblspn
Olive oil - 1 tblspn
Whipping cream - partially skimmed - 1-2 tblspns

Method:
1.Clean, wash and drain the chicken. Rub lemon juice or red wine vinegar (I used red wine vinegar this time) and leave for 15 mins.
2. For the marinade mix together garlic paste, dhania powder, white chilly powder, salt and shaan's zafrani garam masala with the yoghurt. Add salt and olive oil.
3. Rub the chicken pieces with the marinade and set aside for a couple of hrs.
4. Pre-heat the oven to 375 degrees fahrenheit.
5. Put the chicken in a roaster pan and cook in the oven for 40 mins.
6. After 40 mins brush the chicken generously with the whipping cream and leave for 10 more mins.
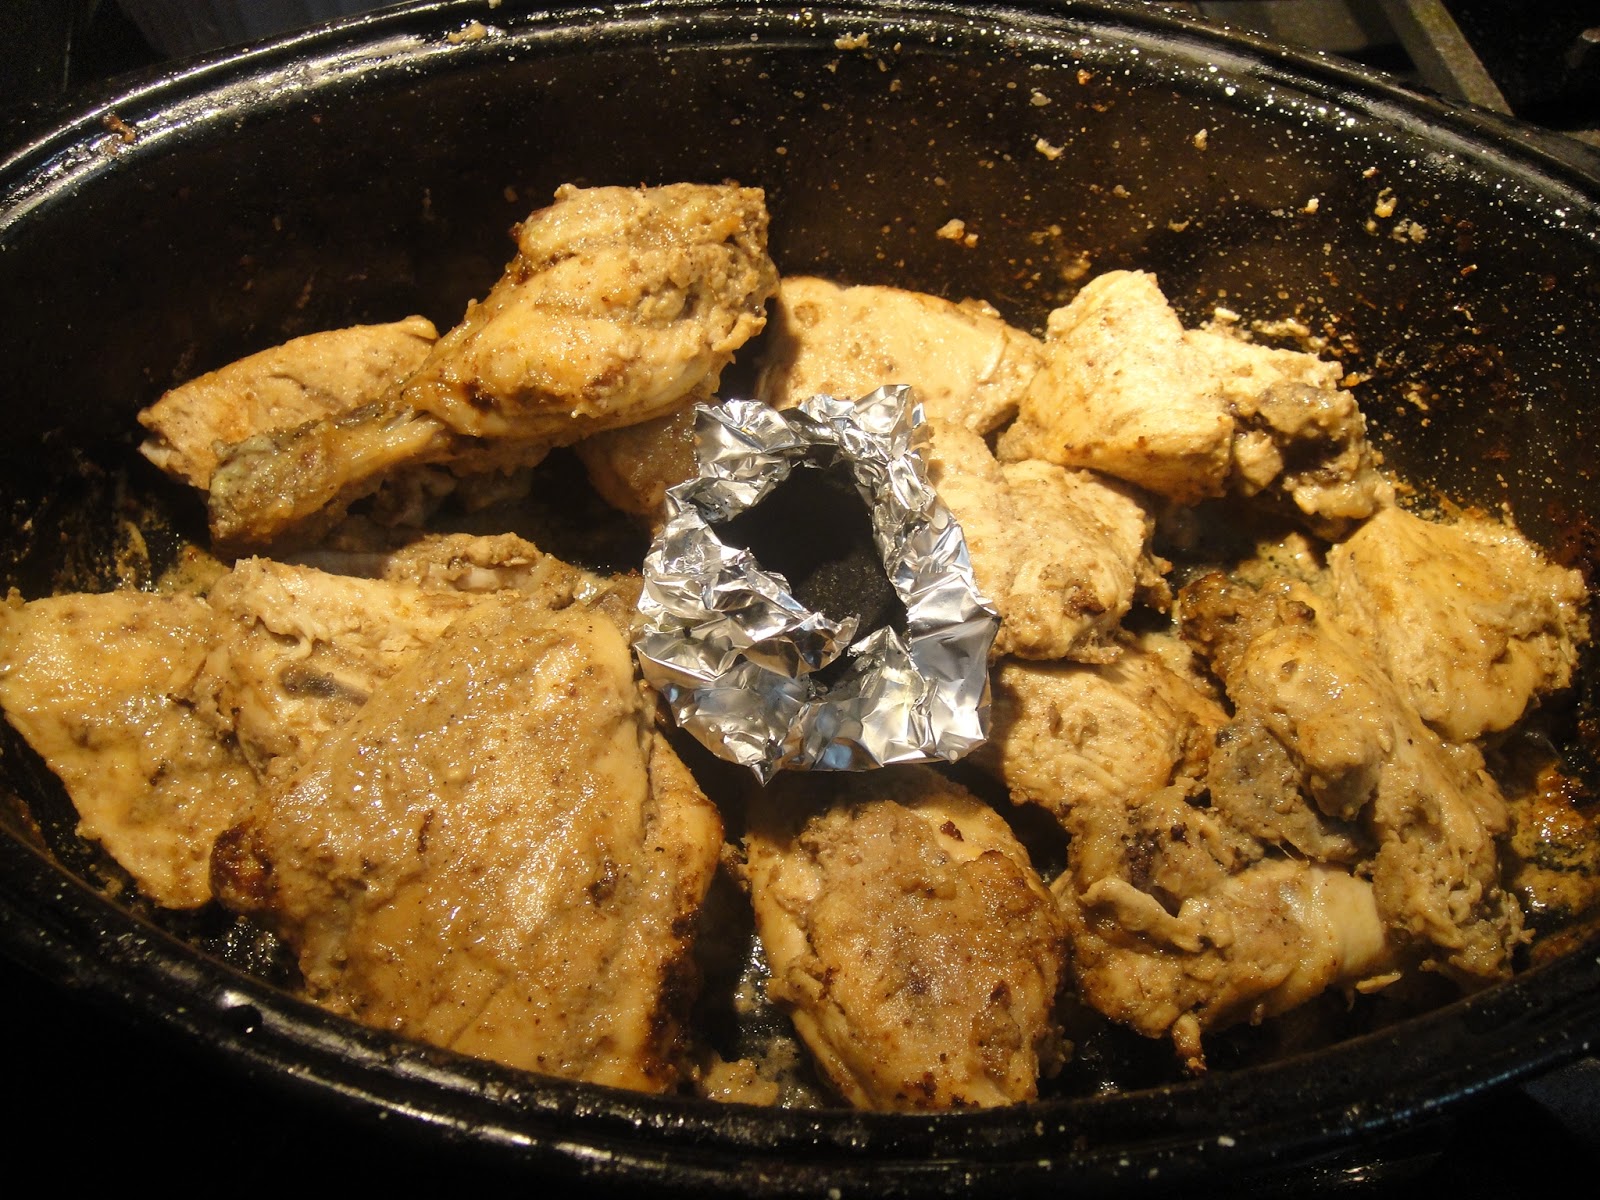
7. Now light up a coal placed in a tin foil shaped like a tiny bowl, drop a blob of ghee or butter on the burning coal and immediately keep it in the center of the roasting pan on top of the chicken.
8. Turn off the oven. Cover the roaster pan with the lid and place it in the hot oven for another 10 mins.
9. The smoked creamy white chicken is now ready. Serve hot with rumali rotis (these rotis are as thin as a ladies handkerchief and so the name) green yoghurt chutney & some cucumber or radish etc.
10. For the green chutney, blend together two stalks of mint, a handful of coriander, 1 inch piece of ginger, 1 green chilly, salt to taste and 1 tblspn of yoghurt. When everything is well blended add more (1/2 cup) yoghurt to it. The chutney is ready.
11. The rumali rotis as seen in the picture above are home made. You can try them at home if you have a gas stove. Check out their recipe on www.vahrehvah.com. He shows you how to make them on a flat skillet but I love to be traditional so I make mine on an inverted cast iron wok on the gas stove.
12. Enjoy the smoked white chicken with rice, rotis, parantas, dal and raitas of your choice. 

Chicken Maqlooba


This is Chicken Maqluba - a popular Palestinian Arab dish which I made for dinner. Most people also think of it as the national dish of Palestine. It is made with lamb or chicken with vegetables and rice. It is basically a one pot dish of meat, vegetables and rice all layered and cooked together. Then the pot is flipped over on the serving platter to display the maqluba which is a sight to behold! I followed a recipe from You tube which I just tweaked a bit by using italian rice instead of falak basumati. Italian rice has that firm texture and nutty flavour which I thought would go well with the maqluba. Here's the recipe: 

Ingredients:
Chicken - 1 Whole (1.5kgs)
Potatoes - 3-4 medium size
Egg plant - one large
Onion - 1 big
Butter - 1 tbs
Olive oil - 2 tbs
Vegetable oil for frying 
Italian Rice - 3 cups
ghee (clarified butter) 2 tbs

Spices for the chicken:
Cinnamon powder - 1/2 tsp
Cardamom powder - 1/4 tsp
Coriander powder - 1 tsp
Cumin powder - 1 tsp
Turmeric powder - 1 tsp
All spice -1 tsp
Seven spice -1 tsp

Spices for the rice: Salt and pepper- 1/2 tsp each; All spice - 1/2 tsp; turmeric - 1 tsp.

Method: 
1. De-skin the chicken, cut into 12 pieces at the joints, clean, wash, drain and keep aside. 

2. Heat a tbs of butter in a big pot and add the diced onion to it. 

3. When the onions sweat a little add the chicken to the pan followed by the spices and mix well. Keep turning over and brown the chicken in the pan. 

3. Add 3 - 4 cups of water and let it cook for sometime till the chicken is done.

4.Slice the egg plants and potatoes separately. Rub a little salt and keep them aside for sometime. The egg plants sweat a little on rubbing salt. Press them gently to drain the water and wipe with paper towels. This way they don't absorb oil when frying.  

5. Deep fry them separately. Drain on paper towels.

6. Boil water in another pot. Add the rice. When the rice is 80% cooked, drain well, then add the spices to the rice, mix well and set aside.

7. Take a small round roaster and grease it with some clarified butter (1tsp) on the inside. Then sprinkle a little of the spiced rice at the bottom.

8. Now spread a layer of the chicken pieces (reserve the broth) on top of the sprinkled rice.

9. Then spread a layer of baked/fried egg plant on top of the chicken. Then a layer of potatoes on top of the egg plant or you can layer both together - one eggplant and one potato slice, all stacked together.

10. Finally add the spiced rice on top. Pour the reserved broth on top of the rice. Cover the roaster with the lid and place it in the pre-heated oven (at 350 degrees fahrenheit) for 15 mins till you see the steam gushing out as soon as you open the lid. Take care not to keep your face close to the roaster when you are uncovering the roaster. It is better to open it little by little. 

11. Keep a round serving platter ready. Remove roaster lid and close it with the serving platter.

12. Put your oven gloves on (thick insulated ones) and holding the roaster bottom with one hand and the top of the closed serving platter with the other, overturn the roaster carefully on to the serving platter and slowly rest the serving platter on the counter top. Remember it is very hot so you have to do it very carefully and tactfully balancing it really well. Otherwise ask someone to help you.

13. Let this rest for 2 mins. Take a serving spoon and tap the roaster's overturned  bottom and all the sides slowly to release the maqlooba from sticking to it.

14. Lift the roaster up slowly to display the maqluba sitting majestically on the serving platter like a queen. The chicken is crisp and golden which was steaming at the bottom of the pot now crowns the dish on the top.The fried egg plant and potato slices like hidden gems add more to the glory. It is a dish beautiful to behold and delicious to eat. There is aroma in the air and many hungry stomachs to feed. Serve hot with yoghurt and salad on the side.  Enjoy.